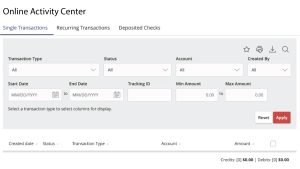
Creating Custom Views
You can select up to six fields to control which data appears in the Activity Center for each transaction type. For example, a user responsible for reviewing wire transactions can select Message to Beneficiary and Beneficiary Bank as two columns of data that will appear, and then save the custom view as a Favorite for later use.
The Online Activity Center – Custom View

To create a custom view in the Online Activity Center
- In the navigation menu, click or tap Services > Online Activity Center.
- Click or tap Filters on the Single Transaction tab.
- In the filter fields that appear, select a Transaction Type and, optionally, a Status.Note: After six columns are selected, you must clear a selected check box before selecting a new check box.
- When Column names with check boxes appear, select up to six columns that you want to view.
- Click or tap Apply Filters.
- (Optional) Click or tap Favorites to save the custom view for later use.


